
Retro Recycling: Book Witch
- NightDawn
- Sep 15, 2019
- 3 min read
She'll come after you in the night if you dare throw those discarded books into the landfill...but if you turn them into free art projects in your community, she will be your friend for life.
Welcome back to the 1960s, when book folding projects were all the rage! I shall be your host on this epic whirlwind time travel adventure; you may call me Toodles La Rue (because someday I will have an Etsy shop under that name--isn't it fab?).
First! Pull out some decent paperback discards. No mold or mildew, please. No cat pee. Nothing that once had a slice of cheese for a bookmark.
Be prepared for the patrons who come to do this project, but say:
“I don't like destroying books! But if I ever want to read it again, I can just unfold the pages, right?”
No.
This time, you will not be able to just unfold the pages and read them again.
Because!
We are going to be covering it in a light coating of black spray paint!
Because we librarians are evil and demand you leave your morals at the door whenever you join us for a free art class.
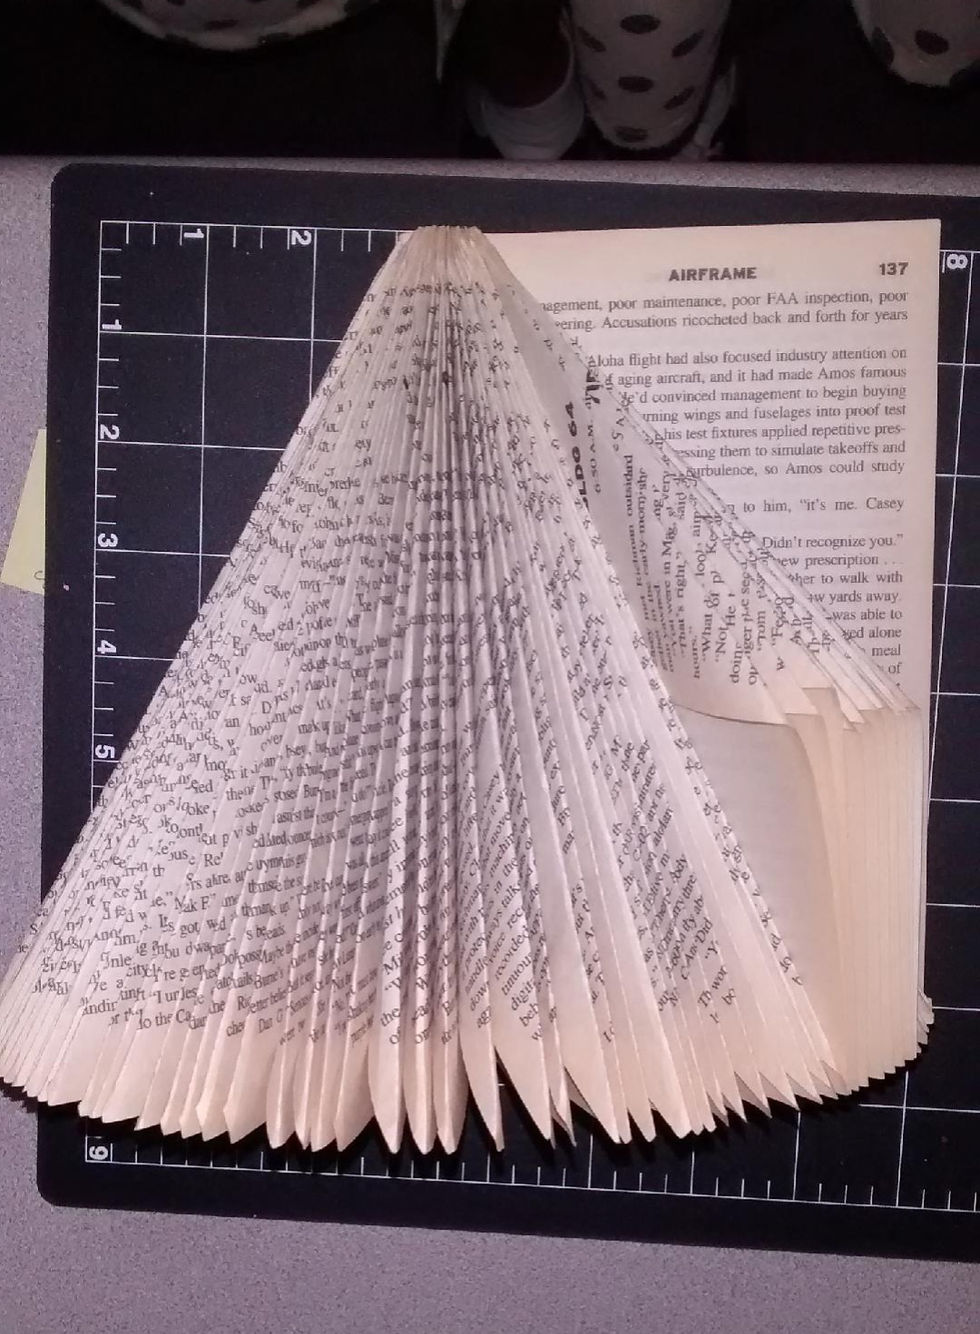
Second step: fold ever page from the top spine corner to the bottom corner opposite, so that it will look like a cone.
WARNING: This will become tedious. Your patrons may cry. They will surely whine and become rather annoying.
TIP: I used a book of around 400 pages, and it was so tight, I didn't have to glue her together in back. After the Book Tree Fiasco of 2017, I found out that, although using a fatter paperback will indeed give you a fluffier tree (or witch), adult attention spans run more toward 200 (or less!), and that they don't mind not having a full, fluffy tree (or witch). And, with a two-hour time limit on classes, less than 200 pages is ideal.
Two hours later...
The folding will take the majority of the class time, so do let your adults take frequent breaks to uncramp their hands by making a witch hat, designing a head, cutting hair, choosing witchy accessories, etc.
If they manage to complete the book folding before the Library closes for the night (mwuahaha, yeah, that won't happen), have them take the books outside (weather permitting) and set them on a spare piece of cardboard (please learn to make nicey-nice with your cataloguing and receiving departments, so that you have a steady supply of free fresh cardboard), and spray them LIGHTLY with dark witch-colored (ie: black, purple, etc) spray paint.
Ahem. I said LIGHTLY!
Because: 1: we do want a little of the text to show through; after all, she is a book witch, and that will make her glamorous; and 2: if you allow your patrons to spray too heavily, the paint will NEVER DRY. (Trust me. You have no idea how many wine bottle projects had to sit on my own desk for two weeks before the patrons could pick up their projects and take them home...)
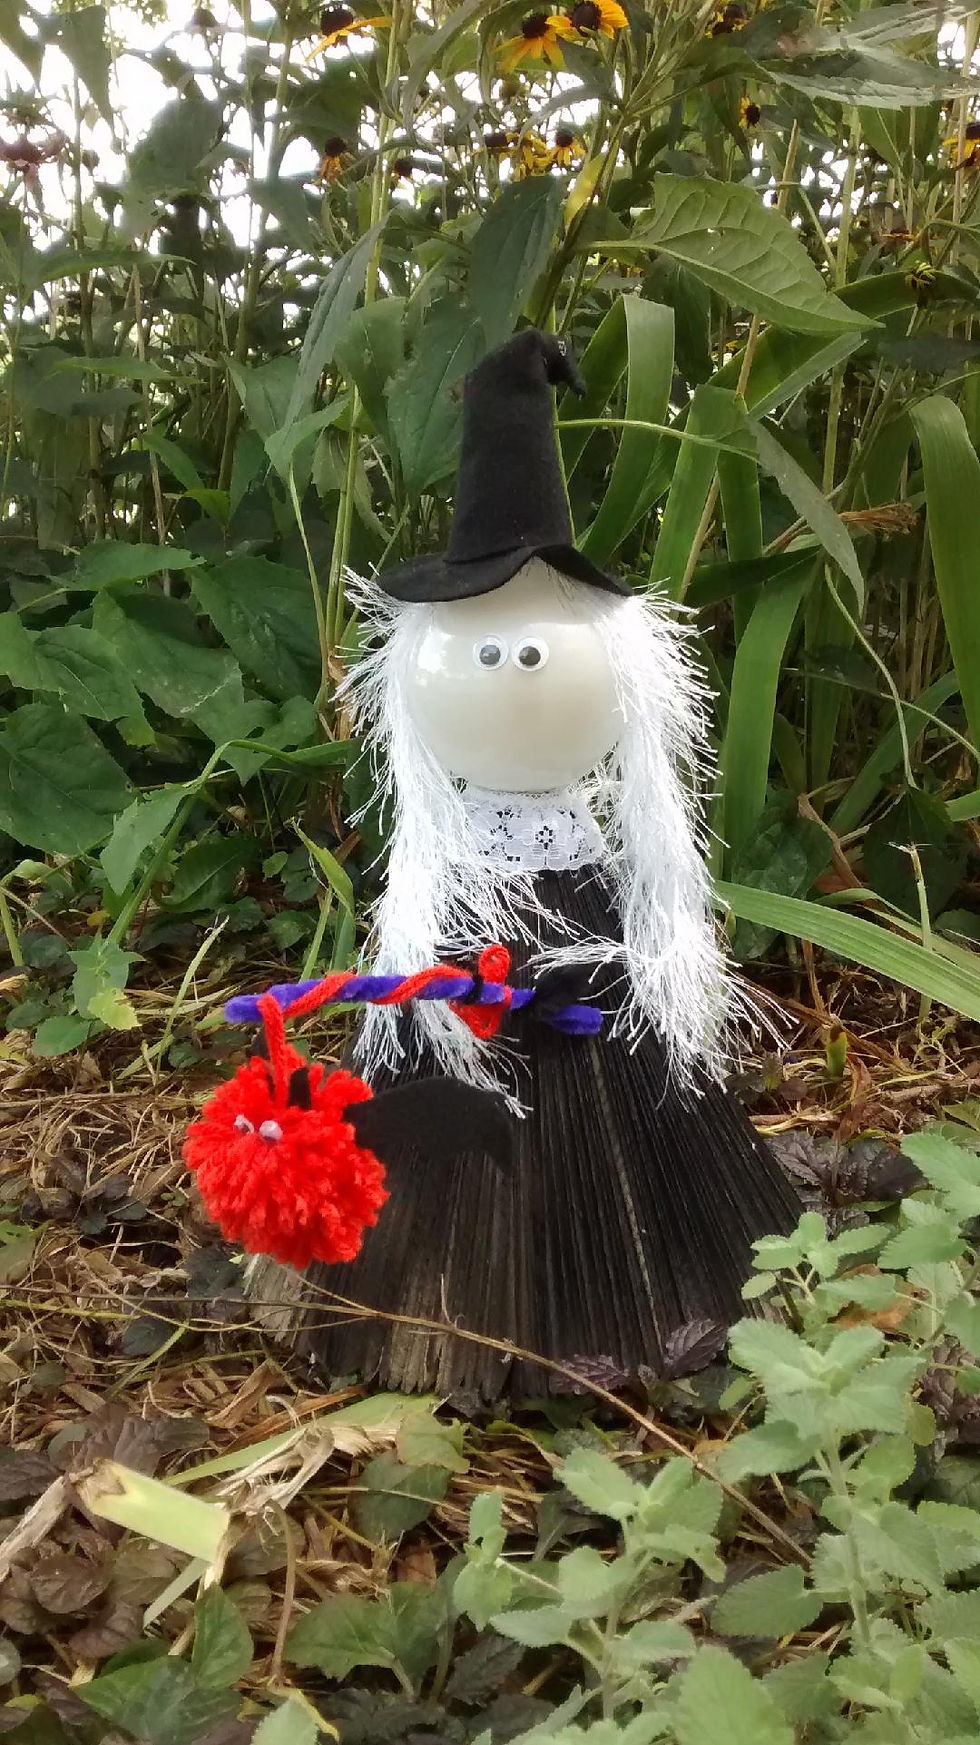
Finally, decorate your witch and give her a smashing personality! My witch happens to enjoy long walks in the middle of the night with her pet bat.
For a head, use something that is about 2-3 inches in diameter (although the size of your book may determine head size). I have seen everything from styrofoam balls to wooden balls... I happened to use a light bulb because I LOVE reusing dead old light bulbs.
Hair: eyelash yarn, regular yarn, or even many of those chunky yarns look very stylish when cut and glued around the top of the head. The longer the hair, the more you will be able to style it later.
WITCHY INGREDIENTS (AKA: SUPPLY LIST)
Mass market paperback ~200 pages
Hot glue guns and glue sticks
Tacky glue
2-3 inch styrofoam ball (or wood) (or light bulb)
Black spray paint (or purple)
Small cast-off bits of fabric or lace for edging
Pipe cleaners for arms
Googly eyes (if you don't have a collection of googly eyes, you are not a proper programming librarian)
Black felt (you may want to get extra--grown-ups do not share nearly as well as the children)
Hair-colored yarn of various textures
Embellishments (buttons, charms, beads, etc)
Random supplies that you just really hope someone will find a use for so that you can finally get them out of your way in your tiny craft storage area even if you're pretty sure there is no way it will fit with this project this is called Hope


Comments